Art Brushes
In V11 we introduced a new type of brush stroke called an “Art” brush, which stretches the brush shape, which can be either vector or bitmap, along the line. This is an example vector brush design:

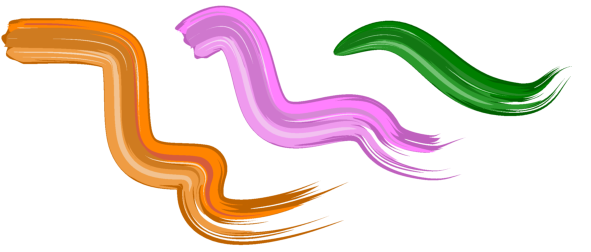
And some example strokes using this brush:
Art vs Scatter brushes
The original type of brushes, in versions up to V10, are now called “Scatter” brushes because they repeat or scatter the brush shape at intervals along a line. But these have been improved as well, you can now use any kind of object in a brush definition. It's now possible to use feathering, text, extrusions, etc. in scatter brush definitions, which makes them much more powerful
How to use:
- Use the Freehand drawing tool to draw a line as usual.
- Give it a reasonably wide line width using the line width dropdown on the top bar. 36pt for example.
- Double click on a brush design in one of the Art folders of the Line Gallery to apply that brush to your line, or select it from the dropdown list.
- Draw some new lines with the Freehand Tool and they will use the same current brush and line width.
How do I create my own art brush?
Please see this article Can I create brushes?
Guidelines for new brushes:
If brushes are created from bitmaps, then the bitmap should be clipped to remove as much empty space from the outside edges as possible. This means the brush will not introduce redundant invisible parts to the strokes you draw with it and it can also reduce the chances of rendering problems. If there is invisible space at the ends of the brush then lines won't terminate exactly at the points where you start and end the strokes. And if there is empty space along the top and bottom edges then the line won't appear to be of the correct width, it will appear narrower.
Brushes should be more or less horizontal. Otherwise strokes will tend to deviate from the line you draw. Brushes should ideally be defined from fully saturated colors. This ensures that when you change the colors of brush strokes the stroke color achieved more closely matches the chosen color, rather than just being a shade of it.
Coloring brush strokes
By default when you select a brush and draw with it, the line you draw has the same color(s) as the brush. But you can change the color of your line by simply selecting it and clicking a color on the color line, or using the Color Editor  . Any new lines you draw subsequently will use the same brush and line color. To draw new lines that have the same characteristics as an existing line, just click on that line and then the next line you draw will look the same.
Brush settings
To edit the settings of a brush, select a line that uses that brush and then press the Edit Brush button on the Freehand Tool InfoBar.

The scaling options determine how the brush is made to fit your line. By default the brush is stretched along the line to fit the stroke. Alternatively you can choose the proportional option if you want to keep the brush design in proportion, ignoring the line width.
With the Repeat along stroke option the brush definition is curved to follow the stroke line and repeated as many times as necessary to fit the line length. The brush design is stretched slightly to make a whole number of repeats fit the line. Note that strokes with very large numbers of repeats can be slow to render.
The line color options allow you to determine how the brush uses the current line color attribute. For example, if your current line color is set to red and you choose a green brush, do you want a red brush stroke or a green brush stroke?
Ignore (use colors in definition only)
The first option means that the current line color will be ignored when you draw with this brush and you’ll get the natural colors of the brush. You can still change the line color of this brush stroke later if you want to, as described above.
Mix line color with definition colors
This option is intended for brushes that have a strong hue, such as the blue brushes provided. The blue in those brushes is replaced with your chosen color.
Mix line color with definition greys
This option is intended for greyscale brushes, such as the pipe brush provided. The grey is replaced with a corresponding shade of your chosen color. When you create a new grey brush, this coloring option is selected for you by default.
Note when you change these options you are asked if you want the changes to apply to existing lines in your design that use the brush. Use the Save As button to make a new brush instead of modifying the current brush.
Loading of Brushes
You must select the "More brushes" button in the brush dropdown to trigger the load, then the brushes should appear in the dropdown. Similarly opening a folder in the Line Gallery also triggers the art brush load.