Transparency types
This article refers to transparency types in v11+. If you have an older version refer to the help file of that version.
Normal (Mix)
The color of the object mixes with the color of underlying objects. The effect is similar to spraying a thin coat of color (or paint) over underlying objects.
Multiply (Stained glass)
The effect is similar to viewing underlying objects through colored glass. It is useful for the simulation of glass and selectively darkening objects. The colors of objects with Multiply applied are:
- White - no effect on the colors of underlying objects.
- Gray & Black - darkens the colors of underlying objects.
- Other colors - darken underlying colors towards saturated color(light red over light red results in mid-red: green over red results in black). If you want to use a colored object to darken underlying colors, you may find DARKEN transparency type easier to use.
Technically the process is subtractive in RGB colorspace.
Screen (Bleach)
Screen has no clear analogy in the physical world. It is useful for highlights when the light source is not white. The color of the object with Screen applied:
- Gray & White - lightens the colors in underlying objects.
- Black - no effect on the colors of underlying objects.
- Other colors - lighten underlying colors towards unsaturated color. (Light-red over light-red gives a pale-red: green over red gives yellow.) If you want to use a colored object to lighten but not color-shift underlying colors, you may find LIGHTEN transparency type easier to use.
Technically the process is subtractive in RGB colorspace.
Overlay
Overlay is a combination of Screen and Multiply and generally used to boost the contrast in an image. The areas of the top object where the underlying objects are light becomes lighter and the areas of the top object where the underlying objects are dark becomes darker
- Grey (darker than 50% grey) will darken and add contrast to the underlying image.
- Grey (lighter than 50% grey) will lighten and add contrast to the underlying image.
- Other colors - lightens and adds contrast to unsaturated colors and darkens and adds contrast to saturated colors.
Hard Light
Hard Light combines Multiply and Screen blend modes. Equivalent to Overlay, but with the bottom and top objects swapped.
- White - no effect on the colors in underlying objects, the whites remain completely white.
- Black - no effect on the colors in underlying objects, the blacks remain completely black.
Soft Light
This is a softer version of Hard Light. Again works similarly to Overlay although in a softer and less harsh way than Hard Light.
- Black - no effect on the colors in underlying objects, the blacks remain completely black.
Luminosity
Luminosity affects the "lightness" of the image. It blends the lightness values of the top objects with the lightness values of the underlying objects, whilst ignoring the color values.
Color
Color is a combination of hue and saturation. Almost the opposite of Luminosity, the colors of the top objects are blended with the colors of the underlying objects whilst ignoring the luminance values.
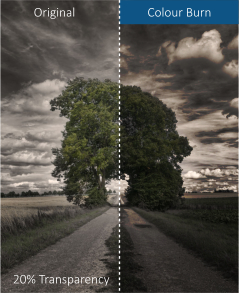
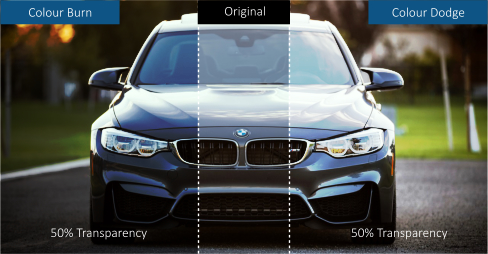
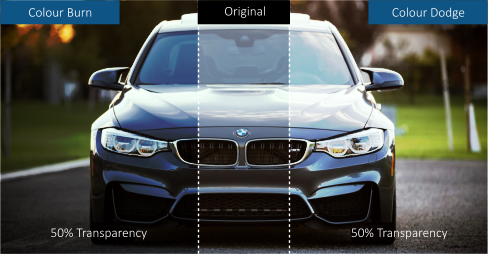
Color Burn
The Color Burn blend mode divides the bottom layer by the inverted top layer. This lightens the bottom layer depending on the value of the top layer: the brighter the top layer, the more its color affects the bottom layer. Blending with white gives white. Blending with black does not change the image.


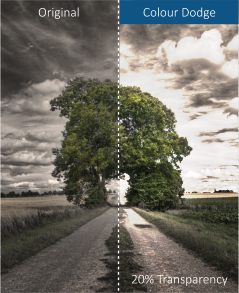
Color Dodge
Color Dodge is a combination of hue and saturation. Almost the opposite of Luminosity, the colors of the top objects are blended with the colors of the underlying objects whilst ignoring the luminance values.


Enhance
Enhance transparency allows you to modify any part of your design using the Enhance Photo Tool, just as if it were a photo. For example you can draw a shape over any part of your design, apply enhance transparency to it and then adjust the brightness of just the area of your design which is covered by the shape.
For all these, the slider controls the amount of transparency from opaque (0% transparent) to fully (100%) transparent.
Applying a flat transparency to an object also applies transparency to the line around the object. It is not possible to set different transparencies, but you can remove the line by setting it to no coloror by selecting "None" as the outline width. To create an object with a transparent fill and a non-transparent line, use a non-flat transparency type.
Note that for legacy reasons, Xara documents which contain older transparency types will still refer to those types by their original names, even though those types are no longer supported. Look for (old) in the transparency type list to identify them.