The Animation Frame Gallery
By default the Animation Frame Gallery is displayed open on the right hand side of the editing window (next to the Page & Layer Gallery) when you open or create an animation document.
|
|
To toggle display of the Frame Gallery, choose "Utilities" > "Galleries" > "Frame Gallery", or click the Frame Gallery icon on the Galleries toolbar. |
|
|
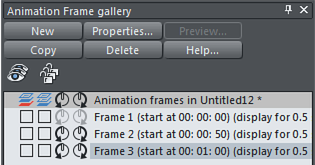
A typical Frame Gallery. Frame 3 is selected and thus visible. |
This shows a list of the key frames in your document. To view any key frame just click its name in the gallery. The Animation Frame Gallery shows frames from the top down, so the first frame is at the top and the each new frame you add gets put at the bottom of the list. You can re-order frames by dragging them. There are buttons to perform the main operations of deleting frames, copying the selected frame (it will always get added to the end) and creating new blank frames.
|
|

The Properties button is very important, since it shows the Animation Properties dialog which controls many aspects of not just the selected frame but the whole animation.
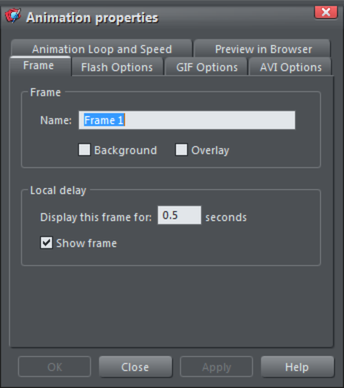
The Animation Properties dialog
A shortcut to display the Animation Properties dialog is to simply double click on a frame name in the Frame Gallery.
|
|
The All Frames Visible (the eye) and Edit All Frames (the padlocks) buttons on the Frame Gallery are useful because they allow you to view or edit all frames together, one on top of the other. |

This is particularly useful if you want to select objects that are on multiple frames.
Note: When you copy a frame, it always copies the selected frame and places it at the end. So in order to insert a new frame, say between frames 4 and 5, select frame 4, click the Copy button, and then drag the new copy from the end to the desired position between frames 4 and 5.
Note: Frame names do not matter and can be anything you like. They do not have to be Frame 1, Frame 2, etc. Animations always play the frames in the order top to bottom, irrespective of the names.
Copyright © Xara