The Fill Tool
Creating a graduated color fill
|
|
The process of creating a different fill is almost identical for all the fill types: |

- Select the object or objects to which you want to apply the fill.
- Select the Fill Tool ("G").
- Select the fill type from the dropdown menu.
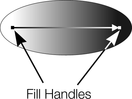
- Click-drag across the object to create the fill. Or, drag one of the fill handles to adjust the fill size and position.
Xara provides a smooth interactive live preview of the fill as you drag.
|
|
As you drag, a fill arrow is created indicating the direction of the fill. Fill handles can be selected and dragged to adjust the position and angle of the fill. |
Coloring fills
Select one of the fill handles and click a color on the Color line or bring up the Color editor and choose a new color. You can press "Tab" to alternate between the fill handles.
Fill Tool InfoBar

|
|
Fill type |
|
|
Fill tiling |
|
|
Fill effect |
|
|
Bitmap name |
|
|
Profile |
|
|
Fill handle/resolution |
|
|
Handle color/Grain |


Fill type selects the type of fill. Selecting from this menu:
- with a selected object, applies the fill to the object;
- without a selected object, sets the current fill type which will then be used for newly drawn objects.
Fill tiling is used when applying bitmap and fractal fills. The options are described later in bitmap fills. Fill tiling changes the repetition of the fill effect. The options are:
- Simple - the fill is used only once, regardless of the size of the object.
- Repeating/repeating tile - repeats the effect so that it fills the entire object.
- Repeating tile inverted - only available on fractal and bitmap fills. This is similar to repeating tile, but every other tile is inverted.
|
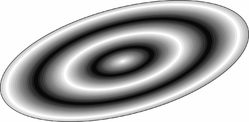
A repeating elliptical fill inside an ellipse shape |
Fill tiling options are not available for conical. All other fill types can be made to repeat. This can produce some useful effects. |
Fill effect is used for all fill types, except 3 and 4-color fills. It controls how the fill colors fade from the start color to the end color:
- Fade: Fades between the two colors in a linear fashion
- Rainbow: Blends along the shortest edge of the HSV color wheel. For example, a blend from yellow to cyan runs yellow-green-cyan.
This option has no effect when the two colors are black, white or gray.
- Alt rainbow: Similar to rainbow except the blend is along the longest edge of the color wheel. For example, yellow to cyan runs yellow-red-magenta-blue-cyan.
Bitmap name displays a pop-down menu showing thumbnails of all the bitmaps in the Bitmap Gallery and is an easy way to select the required bitmap for a bitmap fill.
Fill Profile - you can change the rate of the color transition between the start and end of fills. This applies to all fill types except flat, three color, four color and bitmap (unless it's a contone colored bitmap).
To change the profile of a fill:
- Select the filled object.
- On the Fill Tool InfoBar click Profile. This opens the Profile dialog box.
- You either select a predefined profile from the dropdown list or drag the sliders to create a custom profile. The top option in the dropdown list (the straight line) creates a linear transition between the start and end of the fill.
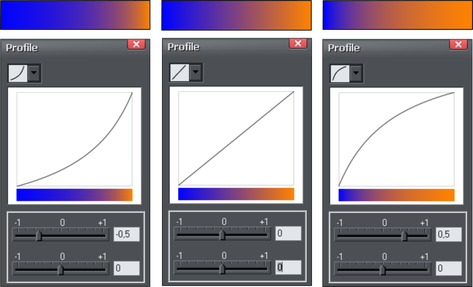
Three different black-to-white graduated color fills and their corresponding profile dialogs. The center, default, is a linear black-to-white transition.
Fill handle: Indicates if the start or end handle is selected. This field is blank for flat fills.
Resolution (bitmap and fractal fills only) Shows the resolution of the bitmap (as long as you don't have a fill handle selected). You can type in a new resolution to change the size of the bitmap. Low resolutions show the individual pixels of the bitmap. You rarely need a resolution greater than 150 DPI, even for typeset output.
Fill handle color: (except bitmap fills) Indicates the color applied to the selected fill handle.
Changing the colors in a fill
To change a color in a fill:
- Drag & drop the color from the Color Line onto a fill handle (you do not have to select the handle first.)
- Or, drag & drop the color onto the object. Each fill has an imaginary center line halfway along the fill arrow. Dropping the color on the start handle side changes the start handle color, and the end handle side changes the end handle.
- Or, if one of the end handles is selected (it's shown highlighted) just click on a color. You can press "Tab" to select the other fill handle, and click the color required for the other end
The Color Line is described in Color handling.
Each method changes the color of one handle only; they do not change any other selected fill handles, or:
- Select the required handle (or handles, also works with multiple objects).
- Choose the required color from the Color Line.
- This changes all selected fill handles.
Moving the start or end handle of the fill
To change the direction and extent of the fill:
|
|
|

Copyright © Xara