Photo Documents
Sometimes it's useful to work on one photo alone, rather than as "objects on a page". This is called a photo document or "photo mode" in Xara, and it behaves more like a traditional photo editor. You can create a photo document in a number of ways:
- Drag a photo file from your file explorer onto the title bar or toolbar of Xara
- Select "File" > "Open" and select a photo file
- Create a blank photo document by selecting "File" > "New" > "Blank photo"
Photo documents are characterized by the following behavior differences compared to traditional Xara documents:
- There is no visible white page. In fact the page dimensions are set automatically to match the photo plus any other objects you've added.
- Photo documents have a 1 pixel grid by default and snap to grid is turned on. This makes it easier to get pixel-accurate crop or clip regions.
- The Pasteboard (the area around the photo) is a darker color. This makes it easy to distinguish at a glance between photo documents and drawing documents.
- The document zoom is set so that the photo fills the view and the Photo Tool is automatically selected as the current tool.
- Dropping additional photo files on top of an existing photo just adds a new photo to the document instead of replacing the photo in its frame. And the view will zoom out so you can see the whole image.
- Images are not resized to be 500 pixels on import as they are in normal documents, but are imported at 1:1, so that at 100% zoom you're seeing the image at full size.
- The pixel smoothing options are altered. By default it selects the "Very high quality" display mode, which is best for images scaled down or zoomed out. It also has pixel smoothing turned off when zooming in, so you can see the pixels are very large zoom factors.
- If you've opened a JPEG photo file as a photo document, when you save changes your JPEG file will be overwritten. See Editing Photo Files below for details.
In all other respects Photo Documents behave like normal Xara documents. You can use all the normal drawing and text tools as usual. If you want to create a photo document of a given size, you can alter the "canvas" or page size by selecting "Utilities" > "Options" and the "Page" tab and entering the required dimensions.
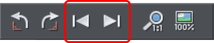
In Photo Documents two extra controls become enabled. The Previous and Next button will move onto the Previous or Next image in the folder from which this image was opened. This will close the current image, so you may be prompted to save the file.
Copyright © Xara