Creating polygons and stars
Use the QuickShape Tool to quickly create almost any regular, symmetrical shape with sharp or rounded corners. You can then drag the edges to bend the sides, and at any time you can change the number of sides or make the object an ellipse, a polygon, or a star.
|
|
|


|
|
Creation Modes: Radius/Diameter/Bounds |
|
|
Polygon |
|
|
Ellipse |
|
|
Starred shapes |
|
|
Curved corners |
|
|
Restore edges |
|
|
Number of sides |
|
|
Editable items menu |
|
|
Editing fields |
|
|
Insert SmartShapes |


To create the polygon or star drag in exactly the same way as for a circle or ellipse using the Radius, Diameter and Bounds Creation buttons to control the origin point of your shape.
- From the center outwards (Radius button),
- Or from an outside edge (Diameter button),
- Or diagonally to create an imaginary rectangle enclosing the polygon (Bounds creation button) letting you distort the polygon or star.
Polygons or stars with rounded corners
|
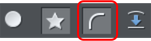
Select the Curved corners button on the InfoBar or double click on a corner point. |
|
|
|
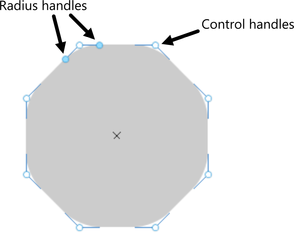
You will see extra handles on the polygon (radius handles) where the rounding starts. To increase or decrease the radius, drag any of the radius handles. |
To remove the round corners:
- Click the Curved corners button.
- Or double click a control handle.
Editing polygons and stars
The Selector Tool lets you move, rotate, resize, and skew the shapes as normal. The Selector Tool is described in Object handling.
Using the QuickShape Tool, you can resize or rotate:
- Drag the corner handles.
- Or select Size & rotation in the Editable Items menu. Type the required values into the text boxes.
|
|
Size Rotation |

You can also nudge the values using the buttons to the right.
To move:
- Drag the handle in the center of the shape.
- Or use the arrow keys on the keyboard.
- Or select Center in the editable items menu. Type the required X/Y values into the text boxes.

|
Apply or remove rounded corners by clicking the curved corners button. |
|
|
Change the polygon to an ellipse by clicking the create ellipse button or double clicking the polygon's center. |
|
|
Make a polygon star-shaped by clicking the starred shapes button. Or by double clicking on a side. |
|


Drag the sides to make them curved. Move the pointer over the edge of the polygon (it changes to an arrow shape). You can now drag the sides.
|
|
On the left are the original polygons. Just drag on the sides to create curved sides. |

"Ctrl + double click" on a side, or click the restore edges button to make the sides straight again.
|
Change the number of sides by typing the number into the menu or selecting from it. |
|

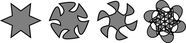
Editing stars
To increase or decrease the depth of stellation:
|
Drag a star handle or select stellation radius & offset on the editable items menu. Type the required values into the text boxes. |
The original shape is on the left. |
|
Or drag the sides to make them curved: |
The original shape is on the left. |

You can also nudge the values using the buttons to the right.
|
|
Offset from center Angular offset |

"Ctrl + drag" one side of a star moves all the sides symmetrically. "Ctrl + Shift dragging" moves pairs of sides as mirror images. "Ctrl + double click" on a side, or click the restore edges button to make all sides straight again.
Copyright © Xara