Text areas

In the Text Tool if you click and drag diagonally on the page you will create a rectangular text area. The blinking cursor will be positioned in the top left corner and you can type or paste text.
A text area can contain a "flowing" text story. This is where a single piece of text flows from one text area to another. It's called flowing text because, like water, as you add or remove text in one area it overflows into connected text areas or flows back from text areas.
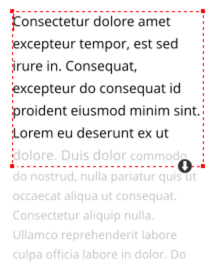
If the text overflows the bottom of the text area the overflowing text is shown gray, although you can continue to edit this text as usual.
Connecting text areas—text flow
When text overflows the bottom of the text area, a flow arrow is shown on the bottom of the area. If you drag this over any other text area, the overflow text will flow into the new text area, and the two areas become connected. This is shown with a flow arrow.
|
|
Overflowing text area with flow arrow.
|
If the text cursor is in an area with overflowing text, then just click-drag on the page to create a new text area. The new text area is automatically connected and text will flow into the new area.
Tip: You can flow text from one area to another on any page, even earlier pages. If you need to flow into an area many pages away, it's probably easier to use the above method, although if you zoom out to a small page size you can drag the overflow arrow across pages.
To disconnect one text area from another, just drag on the overflow indicator and drop it away from any text area. Or click on the flow arrow at the bottom of the text area and select Unlink text flow.
If you delete a text area that is connected to another only the area is deleted, the text will simply re-flow into the remaining text areas.
Automatically flowing text areas (Designer Pro)
|
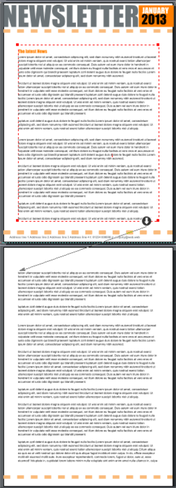
In Designer Pro you can make a text area flow onto a new page automatically when the text in it overflows. This feature can be turned on for any text area and it is on by default in the text areas in the Column templates available under "File" > "New". To turn this feature on for a text area, click on the black arrow at the bottom of the text area, and select the Automatically create new pages option. When a new page is created using this feature, it's placed immediately following the current page. The new page is just as it would be if you'd added it manually (it will have the same background and repeating objects of the current page). But in addition it will also have a copy of each of the text areas on the current page that are linked to the current text flow and they will be linked together similarly. So for example if you're editing a 2 column page, the new page it flows into will be a similar 2 column page. Therefore you can continue entering text into the text flow and new pages will be added as required to accommodate it, just as in a word processor. The text flows automatically from the top text area to the bottom with both areas automatically linked.
|
|
Changing linked text areas together
Often your document will have similar layouts of text areas across multiple pages. If you make a change to a text area on one page, you may want that same change to be reflected for all similar areas in the same flow. So if you move or resize a text area and there are similar areas in the same flow on other pages (that is, they have the same size and position on the page) Designer Pro+ will ask you if you want to change those areas too.
Note that if you choose not to have an area change applied to all similar areas in the flow, the modified area will no longer match those in the rest of the flow. Therefore any subsequent changes you make to that area will not trigger the prompt.
Multi-column pages
|
You can use two or more text areas on your page, linked together as described above, to make a multi-column page layout. But Xara provides a much quicker way to do this. |
|
|
|
Select the text area that you want to make multi-column, or place the text caret in it, then click the Columns button on the Text tool InfoBar. Or right-click on the text and choose Columns… from the context menu. |
|
|
|
The Columns dialog appears... |
Columns dialog |
|


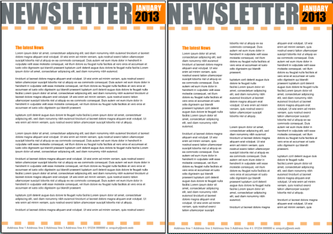
By default the number of columns shown will match the number of linked text areas you have on the current page. But you can change this number to match the number of columns you would like. So enter 3 for a 3 column layout. You can also specify the size of the gap you would like between your columns. When done, press Convert. Your text areas are transformed into a set of matching columns equally spaced.
The overall width of the set of text areas is maintained when you use the Columns dialog, so if your original text areas cover only the left half of the page, so will the set of columns created. Therefore if you want the columns to span the full width of the page, move and/or resize the text areas so they do cover the full width and then use the Columns dialog again to give them all equal size and spacing.
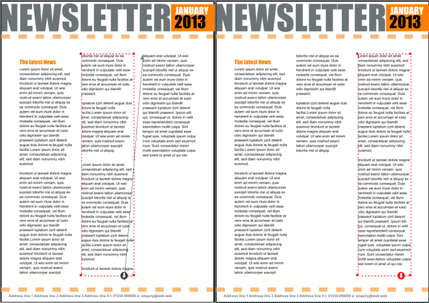
A 1 column page transformed into a 3 column page.
You can of course also use the Columns dialog to reduce the number of columns on the page if required.
Where you have exactly the same column arrangements on multiple pages (where they are in the same text flow), you will be asked if you want the column changes to be made to all those pages too, as described for manual text area changes. Therefore using this Columns dialog you can instantly convert an entire document from single column to multi-column, or back, if there is just a single text flow.
Column breaks (Designer Pro)
Insert a column break into a text area by using the Text tool to right-click at the point in the text where which you want the break to occur. Then select "Insert" > "Break" > "Move to next column". Or use the shortcut (Ctrl+Shift+Enter).
A break inserted mid-way through the middle column (left) shifts the text into the next column (right).
All the text after the column break now appears in the next linked text area in the current flow, whether that area is on the same page or the next page.
Vertically aligned text
![]()
You can align text vertically within text areas, so it's top, center or bottom aligned. This is useful wherever you want to align multi-line text vertically with other features on the page, especially text that you want to edit regularly so the number of lines varies.
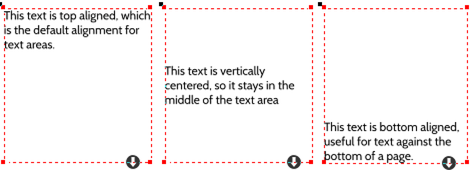
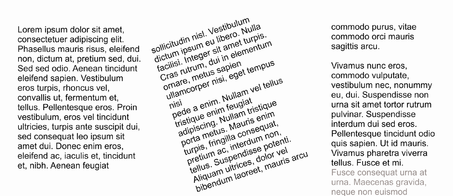
Text areas with top, center and bottom alignments
To change the vertical alignment of a text area, place the text caret in the text and select the Vertical Text Alignment button on the text InfoBar. This reveals a menu allowing you to choose the vertical alignment.

This option is not available for text columns or simple text lines.
Auto-fit to text areas
There are two further options on the Vertical Text Alignment menu - Auto-fit to container and Shrink text on overflow. You can also display the two options by clicking on the black flow arrow which appears at the bottom of a selected Text area. You can choose one or the other and both are unchecked by default.
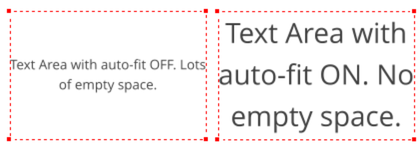
The Auto fit to container allows you to fit any text into any restricted area on a page, so it's great for text that needs to change often where there is restricted space.
With this option on, the font size of the text is automatically adjusted so that the text will just fit into the available space. Add more text and the font size reduces, so the text will still fit. Remove some text and the font size grows so the text will still fill the container.
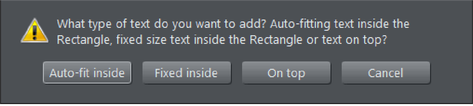
Just select the shape with the Text Tool. You will see a dialog which gives you the following options...
It works with simple text areas...
And also with text fitted into any shape…
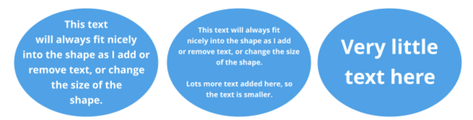
You can use mixed font sizes too, just as you would in a normal Text Area. As you add and remove text, the text scales to fit, while always preserving the relative differences between the font sizes in the text.
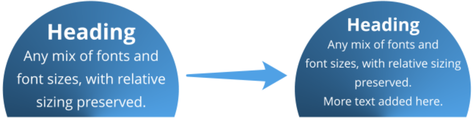
Clearly you can't use fixed font point sizes with this auto-fit option on, because it works by dynamically changing the font sizes. So you will see some perhaps unexpected results if you do try to set specific font sizes. In the example above if we try to make the heading 28pt, it immediately changes to 24.19pt, but that's expected with auto-fit turned on.
Dynamic sizing also works with repelling. The text automatically scales to fit the available space, taking into account the reduced space caused by the repel.

Shrink text on overflow
The last option on the Vertical Text Alignment menu - Shrink text on overflow controls what happens to the text when it overflows the text area. With the option selected the text will scale down so that it always fits the text area. So useful for instances where you need to add more text yet are confined to a specific size.
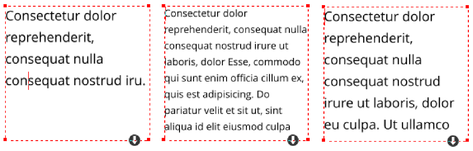
The left text area has plenty of space, so text appears with the font size it was given. In the center example, more text has been added so that it would no longer fit in the text area, so the text has been scaled down to fit. In the right example, some text has been removed so it will again fit in the text area with its original font size.
If you subsequently drag the text area out to increase the area or if you delete some text then the text size will increase to fill the area but it won't get any larger than the original point size. As with Auto-fit to container, any relative size differences in the text are maintained as the text is scaled down and also as with Auto-fit you can't use this feature on linked text areas - a warning prompt will appear should you attempt to do so.
Page breaks (Designer Pro)
Insert a page break into a text area by using the the Text tool to right-click at the point in the text where you want the break to occur. Then select "Insert" > "Break" > "Move to next page". Or use the shortcut (Ctrl+Enter).
All the text after the page break now appears in the first linked text area on the next page.
Resizing text areas
Using the Text Tool, you can click and drag on any of the corner control handles. The text in the area will be reformatted to fit the new size. If you resize a text area using the Selector Tool, using the corner control handles, the text itself is scaled as well, but use any of the other control handles and the text area size is changed and the text reflows in it to fit the new size.
You can also change the size of the text in the text area, by going into the Text Tool, select all the text with Ctrl+A and change the font size on the Text Tool InfoBar.
You can rotate a text area, using the Selector Tool as normal, and the text will flow through the rotated text area normally.
Text flow is unaffected if you rotate any of the text areas
Hold down "Ctrl" while rotating to constrain the text rotation angle to 90° angles and screen aligned angles.
Word count
The word and character count total of the current text is shown in the status line. This also shows the number of overflowing words. If any region of text is selected, it shows the count of this selection instead.
Copyright © Xara