Creating Buttons, Banners And Other Web Graphics
Web Designer is great tool for creating any standalone web graphics for use with other programs or other web authoring tools. You can draw these objects from scratch using the drawing tools, or use ready made web clipart from Elements. Just draw, design or import an item from Elements onto a blank page. Manipulate this as required - size it, color it and change the text or fonts as required, and then export the item as a PNG or JPG.
For example this is how to create a standalone button graphic from a template:
Open Elements and then the Components category to import the component into your document.
Edit this as required e.g. you can:
- Resize it (or rotate) it using the Selector Tool
- Change the color by clicking on the appropriate colors on the left end of the Color Line and choosing 'edit'
- Change the text with the Text Tool
When you're happy, select the object and export it as a PNG or JPG using the buttons in the Website Toolbar (these are on a flyout bar on the Export HTML icon).
For almost all graphics, such as buttons, headings, icons and other non-photographic objects you should use PNG format. For items that contain photos or that have large textured parts made from photos, then JPEG is a better format. If you're saving a rotated photo, or one with a soft shadow, or soft edge, then this should be in a PNG format, but be warned this will be a lot larger file than JPEG.
If you click the Settings button in the Export file dialog you can access an advanced control panel that lets you optimize the image.
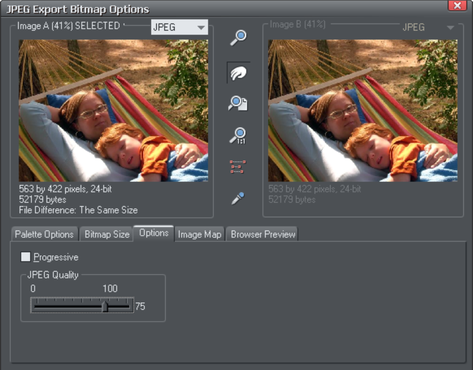
Here you can compare side-by-side two different versions of the same image. For example you can compare a JPEG against a PNG version of the same graphic to compare the quality and / or file size, or you can compare two differently optimized PNG images. Please see JPEG, PNG, GIF and BMP export dialog overview. In the above example the JPEG compression is being adjusted to produce the optimum file size.
Copyright © Xara