Timeline SmartShapes
Timelines are common in many types of documents and particularly in presentations. The Timeline SmartShape consists of a line with an object (or group of objects) repeated along its length with regular spacing. You can increase or reduce the number of objects on the line, adjust their spacing, size, vertical alignment, etc. using the SmartShape's handles.
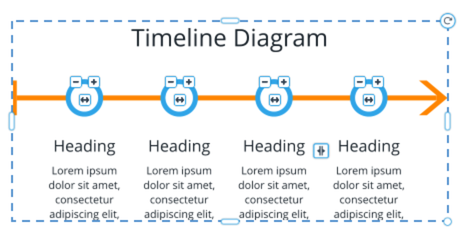
Timeline Smartshape with editing handles
To insert a Timeline, use "Insert" > "From Elements" > "Components" > "Print & Web Components" > "Timelines" or drag and drop them from the Designs Gallery folder of the same name.
Timeline Handle Summary
|
Copy / Remove |
Click on the + to add a new timeline section to the right of the original node (it will copy the node you have clicked the + on), and - to remove the node. |
|
Spacing |
Drag to adjust the spacing of the objects on the line and therefore determine how much of the line sticks out on each end. |
|
End Position |
Some Timelines will have end positions instead of copy. Drag the end position out to add more timeline nodes |
|
Vertical / Horizontal offset |
Drag to adjust the vertical or horizontal positioning of the objects on the line. |
Text Editing
Many of the timelines include text, which of course you can edit using the Text Tool. If you find you can't fit the text you want into the space available, try increasing the size of the objects on the line using the Size handle and then select the text and reduce its font size, so you can fit more text in. If the change the font size of all the text on one object, you should see the text on all the other objects update too, to help you choose the size that fits best.
Symbol Replacement
Some timelines include symbols that you will want to replace. Select the symbol inside by holding down Ctrl and clicking on the symbol. Then right-click and choose Replace symbol from the context menu.
Copyright © Xara