Text inside shapes
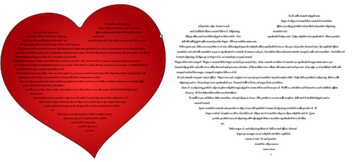
You can place text inside shapes, so that it flows within the shape's outline.
Create your own text filled shapes or have a look in Elements where you can find some text panel designs that use this feature. See "Components" > "Print & Web Components" > "Text Panels" or on the Insert menu "Shape" > "More Text Panels …").

In fact you can add text to any type of object, even groups, as long as there is not already any text in the object. Simply select the object, then go into the Text Tool and click on the object. You will be given an option of whether you want the text to Auto-fit inside (see Text areas for an explanation of auto-fit), Fixed inside or go On top of the object.
Alternatively you can right-click on an object and select Add Text Inside from the context menu.
You can select, edit and format the text just as you would any other text and it will format acccording to whether you selected auto-it, fixed or on top.
Padding margin
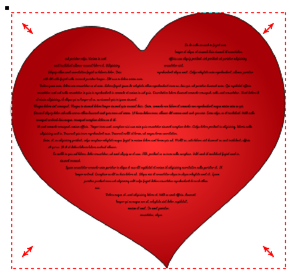
The padding margin is the space between the shape outline and the text. Normally you will want at least a small margin as text flowing right up to the edge of a shape with no margin rarely looks good. You can change the margin in two ways. The easiest is to go into the Text Tool and drag on one of the small red arrows in the corners of the text area. As you drag, the text reformats inside the margin. The distance between the arrows and the corners of the red dotted box mirrors the same margin value, as an additional visual cue.

Text inside shape with adjustment handles
Alternatively you can set the padding margin by right-clicking on the text area and choosing "Text inside" > "Properties…", which allows you to enter a value.
Selecting the containing object
When you click on the object with text inside, you select the text area. The object within which the text flows (most commonly just a shape) is a child of that text area, so it behaves like a group. So if you move, copy, delete or resize the text area in the Selector Tool, the whole combined object is moved, copied, deleted or resized.
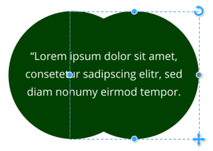
If you want to select and edit the shape that contains the text, you can use Ctrl + click or right-click "Text inside" > "Select …" With the shape selected you can resize or edit it and then the text will re-flow within the new outline. To detach the text entirely from the shape so they become completely separate objects, again right-click and select "Text inside" > "Detach".

A Group of 2 circles with text inside and one circle selected
To make a copy of the shape without the text, select the shape, then copy and paste. To make a copy of the text without the shape, select all the text in the Text Tool, then copy (Ctrl + C) and paste (Ctrl + V).
Shaped text areas
If you want to create a text area of a specific shape then all you need to do is to create a shape, fill it with text and then right-click the shape and select "Text inside" > "Select shape".
|
Then just tap on the no color patch down on the color line. And set the line width to none if your shape had an outline. |
|

Copyright © Xara
