Cropping, Clipping and Animation Size
Before long you'll start to consider creating some Flash animations like you see on the web, say with some wording or a photo that whizzes in from one side.

To create an animation like this, all you need to do is set the page size in Xara to the size you want for your flash animation. So if for example you want a Flash banner which is 468 pixels wide and 60 pixels high, set the page size in your animation document to 468x60. To set the page size, go to the Page tab of the Options dialog (or choose "File" > "Page Options") and set the Width and Height fields accordingly.
When exported or previewed, the flash animation is automatically clipped to the page size you have set. So it's easy to arrange your animation so that objects glide in and out of the visible animation. E.g. by placing an animating object to the left of the page on one key frame and to the right of the page on the next key frame, in the animation the object will be seen to slide in from the left side of the design and disappear off the right side.
You can also change the page dimensions by going into the Selector Tool and dragging on the bottom edge or right edge of the page, to change the page height or width respectively. See Changing the page size in the Document handling chapter for details.
Note: When opening older documents created with earlier versions of Xara, these will not clip to the page (the page size was huge), instead they clip to the size of the drawing. You can control this in the Animation Properties dialog.
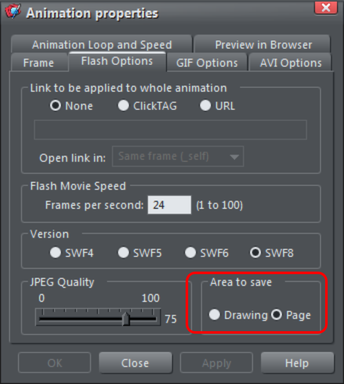
Setting the area to save to be Drawing will create a Flash animation that is only as large as it needs to be – i.e. the same as the outer bounds of the animation. This can be useful if you don't need a specific page size.
Copyright © Xara