Brushes
Brush strokes control the appearance of lines - for example, to apply an airbrush effect. There are two types of brush in Designer Pro / Photo & Graphic Designer.
- Scatter brushes repeatedly stamp or scatter shapes from the brush definition at intervals along a line - you can use feathering, text, extrusions, etc. in scatter brush definitions.
- Art brushes stretch or repeat the brush shape, which can be either vector or a bitmap, along a line.

Art brush (left) Scatter brush (right)
Using an existing brush
|
|
To use a brush, click on the Freehand and Brush Tool |

Now on the InfoBar choose a brush and a stroke profile.

|
|
Select a brush |
|
|
Select stroke shape |


There is a wide range of both Scatter and Art brushes. For ease of identification, the Art brushes have an (A) following the name in the preview window. Draw a line, and it will use your chosen brush and stroke shape.
You can also browse different brush types using the Line Gallery. It's easier to browse brushes in the Line Gallery because they are categorized into folders.
You can also select an existing line in the document and then choose a different brush or stroke shape, to change the appearance of the line.
Creating a new brush
To create a new brush type:
- Design your desired brush shape in Designer, then select it and go into the Freehand and Brush Tool.
- Click Create Brush.
- A dialog box will appear - give your brush an appropriate name and then decide whether it is to be a Scatter or Art brush.
- Click Create.
You can then draw with your new brush straight away. Your new brush appears as the first entry in the brushes dropdown on the Freehand and Brush Tool InfoBar, and in the first Document brushes folder in the Line Gallery.
Brushes are stored in the document. If you want to re-use a brush in another document, you have to load the document containing your custom brush first. Only the default brushes are always available.
Important: Although you can edit a default brush, you cannot save the edits into this brush for use beyond the current session. The default brushes are always restored when the program is started. If you want to edit one of the default brushes, then you have to save it as a new one, using the Save As buttons in the brush setting dialogs.
Guidelines for new brushes
If brushes are created from bitmaps, then the bitmap should be clipped to remove as much empty space from the outside edges as possible. This means the brush will not introduce redundant invisible parts to the strokes you draw with it, and it can also reduce the chances of rendering problems. If there is invisible space at the ends of the brush then lines won't terminate exactly at the points where you start and end the strokes. And if there is empty space along the top and bottom edges then the line won't appear to be of the correct width, it will appear narrower.
Brushes should be more or less horizontal. Otherwise strokes will tend to deviate from the line you draw.
Brushes should ideally be defined from fully saturated colors. This ensures that when you change the colors of brush strokes the stroke color achieved more closely matches the chosen color, rather than just being a shade of it.
Coloring brush strokes
By default when you select a brush and draw with it, the line you draw has the same color(s) as the brush. But you can change the color of your line by simply selecting it and clicking a color on the color line, or using the Color Editor. Any new lines you draw subsequently will use the same brush and line color. To draw new lines that have the same characteristics as an existing line, just click on that line and then the next line you draw will look the same.
Editing a Scatter brush
You will see a different dialog depending on whether you are editing a Scatter or Art brush.To access advanced editing options for a Scatter brush:
- Select the Scatter brush line that you wish to edit with the Freehand and Brush Tool
- Click Edit Brush on the InfoBar.
You will see the following dialog - you can alter:
|
|
|
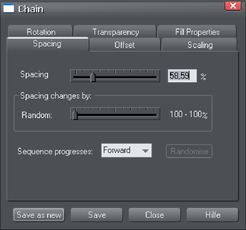
Transparency is described in "Transparency" and colors are described in "Color handling".
If you use a pressure-sensitive graphics tablet, the transparency and scaling options allow you to configure the brush's sensitivity levels. If you do not have a pressure-sensitive graphics tablet, you can mimic the effects using brush shapes.
Save your edits with the save button, with the save as new button a new brush is created.
Editing an Art brush
To edit an Art brush:
- Select the Art brush line that you wish to edit with the Freehand and Brush Tool.
- Click Edit Brush on the InfoBar.
You will see the following dialog:

The Scaling options determine how the brush is made to fit your line.
- Stretch to fit stroke length - by default the brush is stretched along the line to fit the stroke.
- Choose the Scale proportionately option if you want to keep the brush design in proportion, ignoring the line width.
- Repeat along stroke - rather than being stretched along the brush stroke, the brush shape repeats along the stroke, precisely following its course and orientation.
The Line color options allow you to determine how the brush uses the current line color attribute. For example, if your current line color is set to red and you choose a green brush, do you want a red brush stroke or a green brush stroke?
- Ignore (Use colors in definition only) This is the default option. The current line color will be ignored when you draw with this brush and you'll get the natural colors of the brush. You can still change the line color of this brush stroke later if you want to, using the Color editor or clicking a color on the color line.
- Mix line color with definition colors This option is intended for brushes that have a strong hue, as in some of the default brushes provided. The strong hues in those brushes will be replaced with your chosen color, but greyscale tones such as blacks, whites, and greys remain unchanged.
- Mix line color with definition greys This option is intended for greyscale brushes. Shades of grey and shades of other colors in the brush will be replaced by corresponding shades of your chosen line color. When you create a new grey brush, this coloring option is selected for you by default.
Brushes are shared between documents - so when you change any of the above options you are asked if you want the changes to apply to all the lines in all currently loaded documents that use that brush - or just lines you have currently selected.
Use the Save As button to make a new brush instead of modifying the current brush.
Copyright © Xara