Photo Grids, Panels and Frames
There are essentially two types of Photo Grid, which are a compact array of photos: Resizable Photo Grids, and Smart Photo Grids. The Photo Panels are a combination of photos, text and graphic elements and the Photo Frames are a collection of simple, attractive frames.
You can find the grids in the under "Components" > "Image resources" > "Photo Grids". All the SmartShape photo grids (as opposed to the Resizable ones) have 'smart' in the title.
Resizable Photo Grids
These are aesthetically pleasing arrays of photos, Initially, they are set to sizes that are commonly useful, such as square, 16:9, 4:3, etc. but once you've added them to your document you can change the width and height to make them any size and aspect ratio you like, from wide and short to tall and slim.

A resizable Photo Grid.
Just drag on the side, top and bottom handles to resize. The photos are scaled, cropped or uncropped as you do this. Once you have the grid at the dimensions you want, you may need to adjust the scale and positioning of each image, to fit nicely within its new frame shape. Go into the Photo Tool and click on each image to select, then use the adjustment handles on the photo to rotate/scale inside, or move the image in its frame.
Note you can't change the number of photos in these designs, or the layout, they are fixed designs.
Smart Photo Grids
This is a more flexible SmartShape that lets you display any collection of photos, even those with different shapes and aspect ratios, in a compact grid. You can adjust the number of photos on each row, or number of rows, drag to re-order the photos, and adjust the gap between all the photos.
To show these SmartShape control handles, click on the grid. As you hover over each handle a little info tip appears.

|
|
Drag the blue handles in the centers of images to re-order images. |
|
|
Adjusts the gap between the images. |
|
|
Rotate the whole grid. |
|
|
Click a green edge handle to add a new image to the row. This will add a placeholder image onto which you can drag a new photo. |
|
|
Resize the whole grid, alternatively, use the Selector Tool. Hold down shift to resize the grid around its center. |
|
|
Drag down to add another row of images. |
|
|
Click an interior green handle to delete the image. This will reshuffle and resize the other images on the row. |


You can also use the Smart Photo handles on individual images, by going into the Photo Tool and clicking on an image. Each time you replace an image, it puts you into this Photo Tool mode. To get back to the SmartShape handles use the QuickShape Tool (Shift+F2) or go back to the Selector Tool and click again.
Adding & Replacing images
To replace an image with your own photo, just drag and drop a photo file from Windows Explorer (or from the Bitmap Gallery if the photo is already in the current document). The image in the grid that you drop onto is replaced with your photo and the grid automatically updates to accommodate your photo.
To add more images click the green "Add photo" handle on the right end of each row, or drag the "Add / remove rows" handle at the bottom left of the grid to add a complete row.
Note: The height of a row is calculated by fitting the number of images in this row into the width of the grid. So the more images per row, the less tall that row is, especially if the images are wide such as panorama photos. Similarly rows containing just a single image will usually be taller.
Border
There is a "Border width" handle on the top left photo in the grid that lets you adjust the space between each photo. You can have no space at all if you choose, but when you do have a border it's simply empty space between the photos so you see whatever is behind your photo grid. Therefore if you want to see something other than the page background behind, just draw a rectangle behind and set its color or fill to give the border effect you would like.
Photo Panels
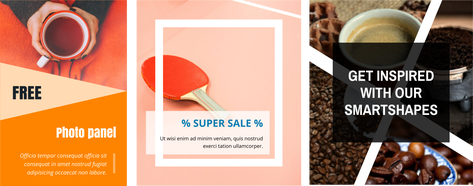
Most of the Photo Panels are customizable. Resizable usually in width and height, you can easily adjust them to fit any space, whether short and fat or tall and thin. Drag the left or right handles to change the width and the top or bottom handles to change the height - the elements will all re-format to fit the new dimensions.
All text can be edited and styled using the Text Tool, the same as with ordinary text. To replace a photo image, go into the Photo Tool, click on the photo to select it inside the panel, then right-click and choose the Replace Photo option in the context menu. Or you can drag a photo from Windows Explorer or from the Bitmap Gallery and drop it directly onto the photo you want to replace.
Find the panels on the Insert menu "Insert" > "Panels" or in Elements under "Components" > "Image resources" > "Photo Panels".
Photo Frames

The photo frames are a selection of attractive designs for presenting photos. As with all photos, to replace the images with your own, just go into the Photo Tool click on the photo to select it and then right-click and choose Replace Photo from the context menu.
Find the frames on the Insert menu "Insert" > "Image" > "Photo Frame..." or in Elements under "Components" > "Image resources" > "Photo Frames".
Copyright © Xara