Changing the page size
The following options are available in Designer Pro and Photo & Graphic Designer. Web Designer offers page size and shadow options only.
You can change the size of the current page to a standard size:
- Right click the page and choose "Page options" > "Page size" tab or choose "Utility" > "Options".
- Choose the required paper size.
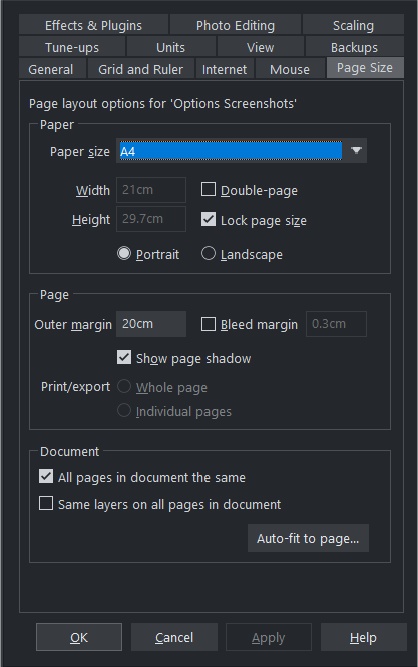
Paper size
You can either choose the Custom option from the paper size list and then enter the width and height, or choose a standard size. Or you can go into the Selector Tool and drag on the bottom edge or right edge of the page to change the page height or width respectively. If you use this method you will be prompted to choose whether the change should apply to all the pages in the document or website, or just the current one.
|
|
Position the mouse pointer over the edge of the page – you will see the mouse pointer change when you are in the right position, then click and drag. |


The current page size is shown in the status bar as you drag.
Automatic Page Extension
Objects that have the Push option turned on (see right click menu, "Page Position" > "Push") will make the page extend automatically if they extend over or close to the bottom of the page. All the web page templates in Elements use this feature so that pages grow as required during editing. See the Push section in the Object Handling chapter for details.
Orientation
- Portrait orientation displays the longest sides vertically.
- Landscape orientation displays the longest sides horizontally. If you entered a custom page size, landscape turns the page sideways.
Outer margin
This lets you set the width of the pasteboard around the page or spread.
Bleed
To produce format filling print results printing shops use a larger format paper and crop it to the target format after it has been printed. Due to mechanical tolerances inaccuracies can happen during this process. For this reason, printing shops recommend including an additional "safe area" around the actual print motif. This is often referred to as the "bleed". This ensures that no important content is cropped and that no white borders appear on the edges if the motif background is not white or a background pattern is used.
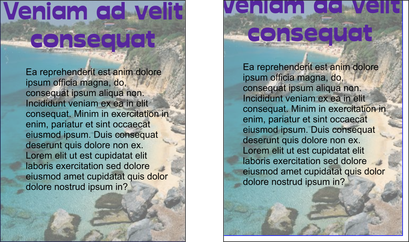
Without this "bleed" area a mechanical error during cropping can lead to white borders or image elements that are too close to the edge being cut.
The bleed area is set in the Page area of the Page Options and in the program it is displayed as a red rectangle around the page. Normally this bleed area is 1-3mm wide. When a PDF is exported for printing the final page size of the PDF will appear based on the page size settings plus the bleed area beyond the actual page. For example, an A4 page (29.7 x 21cm) with a 2mm bleed area will result in a format of 30.1 x 21.4cm.
When exporting to PDF/X, objects that touch the edge of the page will extend into the bleed area by replicating the edge pixels all around the page edge. This is to help prevent gaps appearing on the edge of the page after it has been trimmed.
The exact value depends on the print shop - so consult for details. Some online print shops also request a file format that already contains the bleed area. Here is an example: For a flyer in A6 format (14.8 x 10.5cm) the shop may request a file format of 15 x 10.7cm. This corresponds to a value of 1mm for the bleed area beyond the actual page.
Make sure that the rectangle that contains the background pattern or color extends beyond the page borders at least to the edge of the bleed area. It is also important to make sure that all important page elements are at a safe distance from the page borders. This distance should be at least the size of the bleed area.
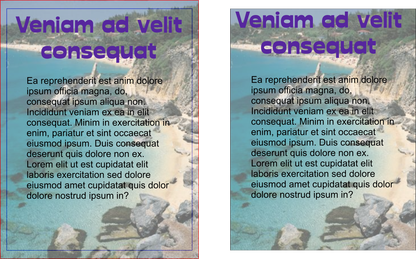
The background image was extended to the edge of the bleed area (red frame) and the header was made smaller. If a cropping error does occur, the background will still cover the entire format and the heading will not be affected.
Auto-fit to Page...
The Auto-fit to page... button will open the Auto-fit to Page dialog. This enables the automatic repositioning and scaling of page content to fit a new page size. The dialog also lets you fine tune the position of document content. This may sometimes be necessary especially with items around the margins of the document like headers, footers etc.
See the Auto-fit to Page section in the Object Handling chapter for details.
.
Copyright © Xara