Background Erase
Background Erase
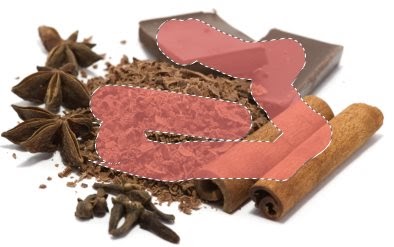
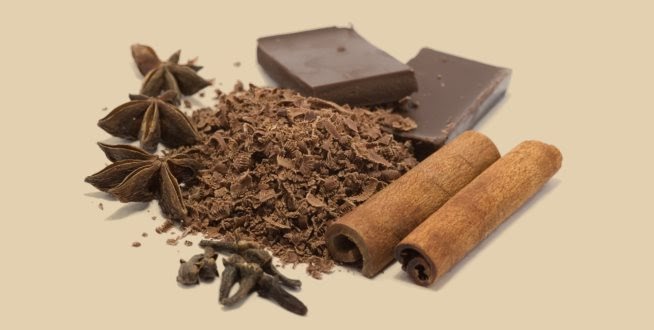
Background Erase, provides a really quick, easy and effective way of cutting complex objects out of photos, so you can place them on alternative backgrounds.
Can I view some examples of Background Erase?
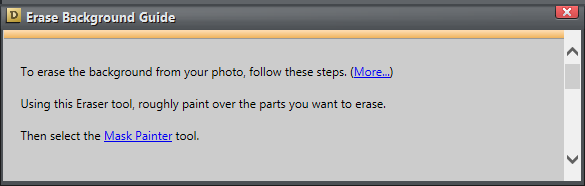
How do I erase the background from my image?
-
- Use the Mask Painter tool
 to paint on the foreground objects. Be careful not to mask any of the background.
- Use the Eraser Tool
 to paint around the background, being careful not to erase any of the foreground objects.

- Click the 'Erase Background' button
 on the Eraser Tool InfoBar.
- Use the Mask Painter tool
The result of the background erase process is a semi-transparent photo, with the background areas made totally transparent, but also areas such as shadows partially transparent. So I can now change the page background to be any color, and it just works. The greater the contrast or color difference between foreground and background objects, the better the results and the less accurate you have to be indicating which areas are which.
How do I export my resulting image?
An image with the background removed is not a JPG (JPG files can’t have transparency in them) instead is a 32-bit ‘alpha channel’ bitmap and can be exported as PNGs (which can support variable transparency).
If you want to save a composited result (e.g the image overlaid upon another background), then make sure you select both the image and background object (marquee select around both, or group them) and select File -> Export JPEG.
Is there any assistance within the program when completing a background erase?
If you click the Background Erase button without having masked or erased any part, or click the small ? help icon on the Eraser Tool InfoBar it will open a new Guide Windows, that leads you through the process to erase the background
Can you provide any additional tips when working with background erase?
- The higher the contrast between background and foreground the less masking and erasing you need to do. On the other hand, the less the contrast, particularly if you find it difficult to see a distinct edge between the foreground and background, then the computer will have difficulty knowing what’s what. So in areas of low contrast you may need to more closely paint the mask and erase areas.
- If the results from the first attempt are not ideal, Undo to get the mask and erase areas back, edit these some more and press the ‘Background Erase’ button again.
- Alternatively you can easily re-touch the finished results using the Eraser brush. It’s particularly useful to give the erase brush a slight soft edge to better blend the edges.
- Be careful to avoid the mask going over any background area, and the erase strokes going over any foreground area.
- Holding Shift down in either the Mask Painter or the Eraser tool to un-mask and un-erase areas.
Photo Enhance Tool | Photo Clip tool | Photo Clone tool | Magic Erase Tool | Photo Heal Tool | Red-eye tool | Content-aware photo scaling | Content-aware photo zoom | Levels tool | Panorama Tool | Perspective Correction | Exif | Opacity Masks | Photo Hue Tool | Color Erase / Selection | Background Erase | Photo Effects | Shadow & Highlight controls