Perspective Correction
Perspective Correction
A simple one-click way to automatically correct common perspective effects was introduced in version 6.
To apply perspective correction to your image, select the photo, and then the Perspective Correction tool.
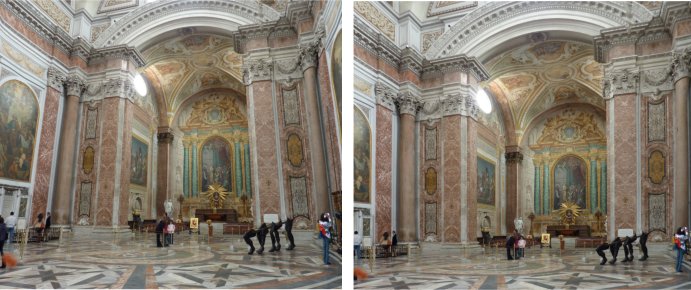
The image on the left, taken inside a very large Basilica building in Rome, shows the common perspective effects of photos taken with a camera close to the ground. To get a 'straight on' photo would require it to be taken from a height of probably 30 feet. The perspective correction tool can create a similar effect automatically (right example).
Simply select the photo, and then the Perspective Correction tool. The process can take some time, depending on the resolution of the image.
Tip: The resulting corrected photo is in a raw BMP format which can take a lot of memory and so you are recommended to optimize your photo to be a JPEG format to reduce the memory and file size. Select the menu Utilities -> Optimize Photo...
Looking for information on other photo tools?
Photo Enhance Tool | Photo Clip tool | Photo Clone tool | Magic Erase Tool | Photo Heal Tool | Red-eye tool | Content-aware photo scaling | Content-aware photo zoom | Levels tool | Panorama Tool | Perspective Correction | Exif | Opacity Masks | Photo Hue Tool | Color Erase / Selection | Background Erase | Photo Effects | Shadow & Highlight controls